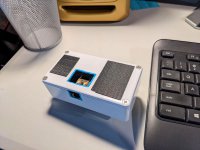
Here's the petal reverb example ported over to terrarium.
I'm guessing that the pots are hooked up the same as the petal (I'm pretty sure that I guessed wrong - will update the code).
It sounds like a reverb. I haven't played with it much. Just played about 5 minutes.
So the Terrarium pots map to petal knobs, as follows:
Pot1 -> Knob1
Pot2 -> Knob3
Pot3 -> Knob5
Pot4 -> Knob2
Pot5 -> Knob4
Pot6 -> Knob6
So the Reverb controls are as follows:
Pot1: Reverb Time (Small room to near infinite)
Pot2 Reverb Damping (Internal Cuoff filter from about 500Hz to 20 Khz)
Pot3: Send Amount (Controls amount of dry signal)
The code has been updated to work, correctly.
C++:
#include "daisy_petal.h"
#include "daisysp.h"
#include "terrarium.h"

using namespace daisy;
using namespace daisysp;
using namespace terrarium;

// Declare a local daisy_petal for hardware access
DaisyPetal hw;

dsy_gpio led1;

Parameter vtime, vfreq, vsend;
bool bypass;
ReverbSc verb;

// This runs at a fixed rate, to prepare audio samples
void callback(float *in, float *out, size_t size)
{
    float dryl, dryr, wetl, wetr, sendl, sendr;
    hw.DebounceControls();
    verb.SetFeedback(vtime.Process());
    verb.SetLpFreq(vfreq.Process());
    vsend.Process(); // Process Send to use later
    if (hw.switches[Terrarium::FOOTSWITCH_1].RisingEdge())
        bypass = !bypass;
    for (size_t i = 0; i < size; i+=2)
    {
        dryl = in[i];
        dryr = in[i+1];
        sendl = dryl * vsend.Value();
        sendr = dryr * vsend.Value();
        verb.Process(sendl, sendr, &wetl, &wetr);
        if (bypass)
        {
            out[i] = in[i]; // left
            out[i+1] = in[i+1]; // right
        }
        else
        {
            out[i] = dryl + wetl;
            out[i+1] = dryr + wetr;
        }
    }
}

int main(void)
{
    float samplerate;

    hw.Init();
    samplerate = hw.AudioSampleRate();

    vtime.Init(hw.knob[hw.KNOB_1], 0.6f, 0.999f, Parameter::LOGARITHMIC);
    vfreq.Init(hw.knob[hw.KNOB_4], 500.0f, 20000.0f, Parameter::LOGARITHMIC);
    vsend.Init(hw.knob[hw.KNOB_2], 0.0f, 1.0f, Parameter::LINEAR);
    verb.Init(samplerate);

    hw.StartAdc();
    hw.StartAudio(callback);

    led1.pin = hw.seed.GetPin(22);
    led1.mode = DSY_GPIO_MODE_OUTPUT_PP;
    led1.pull = DSY_GPIO_NOPULL;
    dsy_gpio_init(&led1);

    bypass = false;

    while(1)
    {
        // Do Stuff InfInitely Here
        dsy_system_delay(10);
        dsy_gpio_write(&led1, bypass ? 0 : 1);
    }
}
Last edited:


 . After searching a bit on the internet I found that this is the port used to flash the Daisy over JTAG.