Locrian99
Well-known member
- Build Rating
- 4.00 star(s)
Hello all.
Taking a quick break from Xmas festivities. Youngest down for a nap and the oldest is currently enthralled with his haul so I’m having an IPA and figured I’d do a little write up in this headphone amp I built to go with a Xmas gift for my son.
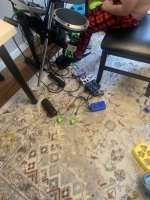
Month or two back I found a used behringer electronic drum set on Facebook for 60$. So I snagged it for my 6 year old. I don’t really have any “spare” amps I’d care to put through the abuse of being owned by a 6 year old so I decided I would take a little blue tooth speaker with an aux in and this headphone amp board and see how it would do. I’ve ran the speaker off a ruby before and well it works…
On to the build as with all the pedal pcb boards it’s very straightforward and easy to assemble.
One thing I think would be a nice addition is an on board on/off switch for power. I think I will end up adding one, also a cool addition would be the board having one of the slots for holding a battery could even set up the on board switch to change from battery to the hardwire plug (I know you can do that with a switched dc jack). The board is very roomy, I’m assuming this is done to keep certain traces separated from my limited experience breadboarding and doing some perf stuff with 386 amps layout def matters. Would be nice if it was a little more compact but I’m assuming it was done for a reason. There was a comment of another one coming out in the future with some added features like cab sim etc and I’m eager to try that.
This one works great for my purpose. I wanted him to have something so he didn’t have to wear headphones to play but couldn’t shake the house at the same time. Would sound clear but wasn’t worried about this being studio quality by any means. I would recommend this build for a little bench amp for basic testing or if you just are mainly worried about hearing your guitar. Though it did greatly improve with a tone job clone (I think it’s box and all eq) and also with the 6 band parametric eq in front of it.
The kiddo loves it and he is having a blast running the drums through whichever pedal he can grab.
Taking a quick break from Xmas festivities. Youngest down for a nap and the oldest is currently enthralled with his haul so I’m having an IPA and figured I’d do a little write up in this headphone amp I built to go with a Xmas gift for my son.
Month or two back I found a used behringer electronic drum set on Facebook for 60$. So I snagged it for my 6 year old. I don’t really have any “spare” amps I’d care to put through the abuse of being owned by a 6 year old so I decided I would take a little blue tooth speaker with an aux in and this headphone amp board and see how it would do. I’ve ran the speaker off a ruby before and well it works…
On to the build as with all the pedal pcb boards it’s very straightforward and easy to assemble.
One thing I think would be a nice addition is an on board on/off switch for power. I think I will end up adding one, also a cool addition would be the board having one of the slots for holding a battery could even set up the on board switch to change from battery to the hardwire plug (I know you can do that with a switched dc jack). The board is very roomy, I’m assuming this is done to keep certain traces separated from my limited experience breadboarding and doing some perf stuff with 386 amps layout def matters. Would be nice if it was a little more compact but I’m assuming it was done for a reason. There was a comment of another one coming out in the future with some added features like cab sim etc and I’m eager to try that.
This one works great for my purpose. I wanted him to have something so he didn’t have to wear headphones to play but couldn’t shake the house at the same time. Would sound clear but wasn’t worried about this being studio quality by any means. I would recommend this build for a little bench amp for basic testing or if you just are mainly worried about hearing your guitar. Though it did greatly improve with a tone job clone (I think it’s box and all eq) and also with the 6 band parametric eq in front of it.
The kiddo loves it and he is having a blast running the drums through whichever pedal he can grab.