Fingolfen
Well-known member
- Build Rating
- 5.00 star(s)
One of my favorite enclosures and pedals was the Steggo take on the Zendrive (which has since been re-introduced by Warm Audio as the Warmdrive). I'd initially used the AionFX board for my builds, but my friend at South Obolon FX released a version of this board and was kind enough to make me a Steggo version. I'd built one up a few months ago, but I've finally gotten a few more done...

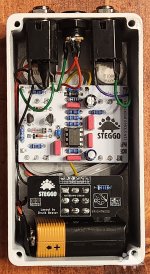
Although the PCB is different, I'm using the same exact parts load out on these new builds as I've done in the past. All of the resistors are new 1% metal film. The lower value capacitors are new tight tolerance metal film, or MLCC. The electrolytic capacitors are Nichicon or Panasonic. As with all of my clones of this type, I'm using a mix of two BAT41 diodes and one 1N34A diodes. I'm not sure what Warm Audio is doing on their build as I haven't been able to find a photo of the PCB itself. The 1N34A is NOS picked up from my local electronic bits store. They have a lot of them, and I've managed to find a good range of voltage drops in the mix. This one is a bit hotter with a voltage drop near 0.4V

I'm still including a battery cable this time around, but I may drop it going forward. Most people don't seem to care as much about batteries, so I may make it an optional upgrade or custom ask only. As per my normal practice all of the connections to the jacks are insulated with heat shrink tubing. Generally all of the connections are far enough away from the enclosure or other components to not be an issue, but it's just an added layer of protection. I used a little bit more ribbon cable when wiring the main PCB to the daughter board, though the connection points aren't lined up exactly the way they are on a PedalPCB or one of my own boards. Using lengths of ribbon cable is still faster than cutting and stripping hook-up wire!

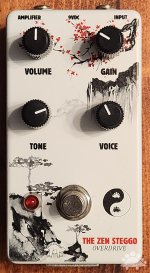
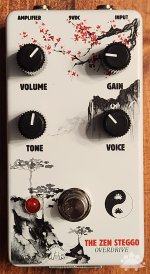
I've actually built about three of these at this point. The first one (with the narrower knob spacing) is actually in an enclosure I'd made up for the AionFX board (but ran out of boards!). The potentiometers on the South Obolon board are a bit further apart - like on the Thagomizer (Colorsound Power Boost) board he laid out (another pedal I need to make more of!). I went ahead and had some new enclosures made up with the updated knob spacing. I simply moved the background art around a little bit along with the knob labels to get everything lined back up.
Sound wise, the new board and the old board are indistinguishable, and if I'd wanted to angle the pots a bit I could have just kept the original enclosure, but making the slight modification for the new board was easy enough. These are a lot of fun to build, and they sound great as well!
Original blog entry: https://steggostudios.blogspot.com/2024/02/updating-most-tranquil-steggo-pedal.html

Although the PCB is different, I'm using the same exact parts load out on these new builds as I've done in the past. All of the resistors are new 1% metal film. The lower value capacitors are new tight tolerance metal film, or MLCC. The electrolytic capacitors are Nichicon or Panasonic. As with all of my clones of this type, I'm using a mix of two BAT41 diodes and one 1N34A diodes. I'm not sure what Warm Audio is doing on their build as I haven't been able to find a photo of the PCB itself. The 1N34A is NOS picked up from my local electronic bits store. They have a lot of them, and I've managed to find a good range of voltage drops in the mix. This one is a bit hotter with a voltage drop near 0.4V

I'm still including a battery cable this time around, but I may drop it going forward. Most people don't seem to care as much about batteries, so I may make it an optional upgrade or custom ask only. As per my normal practice all of the connections to the jacks are insulated with heat shrink tubing. Generally all of the connections are far enough away from the enclosure or other components to not be an issue, but it's just an added layer of protection. I used a little bit more ribbon cable when wiring the main PCB to the daughter board, though the connection points aren't lined up exactly the way they are on a PedalPCB or one of my own boards. Using lengths of ribbon cable is still faster than cutting and stripping hook-up wire!

I've actually built about three of these at this point. The first one (with the narrower knob spacing) is actually in an enclosure I'd made up for the AionFX board (but ran out of boards!). The potentiometers on the South Obolon board are a bit further apart - like on the Thagomizer (Colorsound Power Boost) board he laid out (another pedal I need to make more of!). I went ahead and had some new enclosures made up with the updated knob spacing. I simply moved the background art around a little bit along with the knob labels to get everything lined back up.
Sound wise, the new board and the old board are indistinguishable, and if I'd wanted to angle the pots a bit I could have just kept the original enclosure, but making the slight modification for the new board was easy enough. These are a lot of fun to build, and they sound great as well!
Original blog entry: https://steggostudios.blogspot.com/2024/02/updating-most-tranquil-steggo-pedal.html

