MichaelW
Well-known member
- Build Rating
- 5.00 star(s)
This is my second Cleaver build as I gave the first one I built to my brother. He needed a clean boost and mine was sitting on the shelf not getting much attention.
So I figured I'd send it on where it would be used. Of course as soon as I sent it I missed it
The first one I built was a milestone for me. It was early in my DIY pedal building days and my first attempt at laying out top jacks in a 1590B.
It's such a tiny circuit that there was a lot of room to work with.
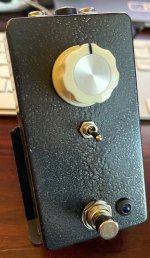
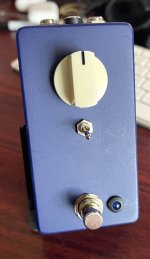
For this build I decided to take one of the cheap crappy 1590B's I got from Small Bear with the really poorly done powdercoating and sand it all off and do a rattle can paint job. I finally stopped off at Home Depot this past weekend and picked up a couple more colors. So you may be seeing more of the same color enclosures in future build reports
I got a little impatient with this one and did not let it dry enough. It could have used another 24 hours drying time. So there's some scuff marks and fingerprints on it.
I also learned another valuable lesson about rattle can paint jobs. Drill the enclosure first!
I actually painted this one twice. First time, I did let it dry but just center punching, drilling, etc left a lot of handling marks.
So I sanded it back to bare and re painted it after drilling. (adding to my impatience, been working on this pedal for 4 days now, which is an eternity for MichaelW!)
Anyway, I gingerly put it all together and it's living on my mini board right now, bumping the LPB-1 off for now. Definitely one of my favorite boosts. In clean mode it's super transparent, just makes everything louder. In "dirt" mode it can do wonders in front of a drive pedal or amp. Still pretty transparent in that it does not color your guitar or pedal tone much but adds some grit and girth. Unlike the Modus Operandi that's on the board next to it, that has some nice coloration and compression to it.
Between these two boosts I have a lot of bases covered depending on what I'm trying to achieve.
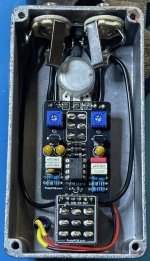
I biased both JFETs to exactly 9.4v. I decided to just set the bias to whatever was on pin 1 of the charge pump and be done with it. It sounds great and I did not bother with any further fine tuning. I love the bias test points that @Robert incorporates into most of the PedalPCB boards. Very convenient!
Oh and the trimpots are "vintage Bourns trimmers". I got a full tube of them when they were on sale at Electronic Goldmine. The label on the tube said something referring the the 60's. I don't if they're really that old but there's some vintage mojo biasing going on in this pedal.......
The paint color is another Hammered paint color, black this time. I think these textured colors tend to hide the imperfections on bare enclosures better.


