
It seems everyone and their brother has built one of these. Hard to find anyone that doesn't like it, both DIY and COTS versions. I only did a quick play to make sure it works, but I agree with all the key things that have been attributed to this pedal: ultra transparent, perfect for the edge-of-breakup thing, may or may not even make it to "mid gain" level (depending on your definition). I know it has a lot of overlap with the Tommy (Timmy), and I agree with the transparent aspect of that comparison, but on my quick test play, I do see a bit of the Mojo everyone seems to talk about in with the Mach 1 (Lightspeed).
When I get a chance, I need to do a little battle royale between this, my Tommy, my Guardian and maybe throw in the Red Herring just for fun (the RH isn't quite as transparent as the others, but it's close, and I just like the thing).
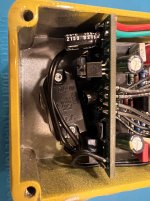
The build was interesting... Actual Mach 1 board is small, low parts count, and super simple to assemble. Nothing interesting there.
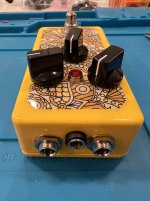
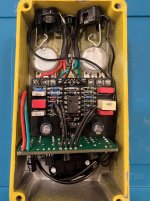
The biggest issue was that I wanted to use my custom mcu relay bypass board with it, and I drilled the footswitch hole too high (I used a 1590B enclosure and @MichaelW's excellent 1590 Top Mounted Jacks guide). I almost gave up several times, and even though I managed to get it in there, I'm not confident with the way the relay board directly touches the actual effect board. So far it's fine in my basic testing, but not sure how it will fare in the long run.
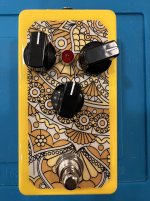
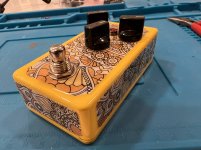
The fun part, however, was using @SillyOctpuss's great Envirotex Build Guide for my first-ever Envirotex pour. I first applied some fun stickers I got from AliExpress, inspiration from @DAJE (see here). I didn't want to worry about the stickers peeling off with use, so I thought Envirotex would be good for that. I even coated the sides. I think it turned out pretty well - there's a small blemish or two on the top if you look just right, and the sides definitely aren't smooth. But at a distance you can't tell at all, and frankly, being my first time, it turned out way better than I expected. Good enough for rock'n'roll!
Edit: credited @DAJE for the stickers, see Tone Vendor mk 2 for example.
When I get a chance, I need to do a little battle royale between this, my Tommy, my Guardian and maybe throw in the Red Herring just for fun (the RH isn't quite as transparent as the others, but it's close, and I just like the thing).
The build was interesting... Actual Mach 1 board is small, low parts count, and super simple to assemble. Nothing interesting there.
The biggest issue was that I wanted to use my custom mcu relay bypass board with it, and I drilled the footswitch hole too high (I used a 1590B enclosure and @MichaelW's excellent 1590 Top Mounted Jacks guide). I almost gave up several times, and even though I managed to get it in there, I'm not confident with the way the relay board directly touches the actual effect board. So far it's fine in my basic testing, but not sure how it will fare in the long run.
The fun part, however, was using @SillyOctpuss's great Envirotex Build Guide for my first-ever Envirotex pour. I first applied some fun stickers I got from AliExpress, inspiration from @DAJE (see here). I didn't want to worry about the stickers peeling off with use, so I thought Envirotex would be good for that. I even coated the sides. I think it turned out pretty well - there's a small blemish or two on the top if you look just right, and the sides definitely aren't smooth. But at a distance you can't tell at all, and frankly, being my first time, it turned out way better than I expected. Good enough for rock'n'roll!
Edit: credited @DAJE for the stickers, see Tone Vendor mk 2 for example.
Attachments

Last edited: