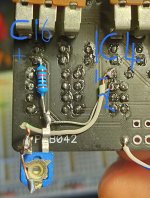
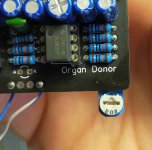
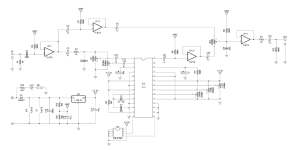
Hi Thommo,
eh là bas ma has got it covered in regards to checking for shorts and values with a multi-meter, but I still have questions & suggestions.
Took me a hot minute to figure out what the blue squiggles were — IC pins "1-" and "2-"

I've looked at both the old and new schematics; what you've done in theory should be working so I'd do like eh là bas ma says and double-check for continuity where there should AND should NOT be. Especially test around IC4's 1,2,3,4 and C11, R11, R8, R4 — hard to tell with reflections off the flux, but there may be a short there.
BTW, you can edit your first post to include the fact that you severed the connection between pins 1&2 of IC4;
which brings me to the question: HOW did you do this disconnect?
It's a multi-tiered PCB, so depending on how you severed the trace you may have inadvertently cut another trace, OR as I suspect not actually made the full cut between pins 1&2 (which would explain why the trimmer does nothing when you turn it). Test for continuity between pins 1&2 with the trimpot fully off (or better, trimpot disconnected).
Suggestions:
- Rewire on top (component-side) of the PCB instead of having wires cross from a trimpot on the underside. It will be easier to see & control short-prevention of the mod. Lots of shorting-potential underneath.
- SIMPLIFY the wiring — you can pull VREF from one side of R8 or R4 which are much closer to IC4 Pin2 than C16:
You could put VREF direct to IC4-pin 2, and ONLY there, because
You then run a trimpot from IC4's pin 2 to pin 1 (Short the trimmer's lugs 2&3)
You could still do everything underneath, but just run the VREF to pin 2, then trimmer between pin 2 > pin 1.
or
Half & Half: You could put the trimmer on top (component side), and the 10k from VREF to pin 2 underneath.
After looking at the board some more, here's how I'd do it — everything underneath simplified and pulling VREF from R4 (after ensuring that PCB's trace between IC4 Pins 1 & 2 is severed w/o damaging anything else):
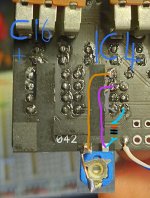
Nothing crosses.
You could even do it top side and put the trimmer right on the PCB instead of floating it in mid-air, it'd be more stable, and run jacketed wires instead of bare ones underneath the IC socket:
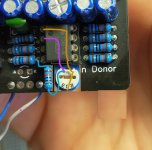
BTW — I've drilled holes in PCBs, cut slots in from the side and other hackage to sever traces, AFTER checking to make sure I wasn't damaging other traces.
Even have had to chop corners off a board, one time, to fit it in a smaller enclosure.
Hard to check traces and ground-planes with the PedalPCB boards, 'cause you can't shine light through them.
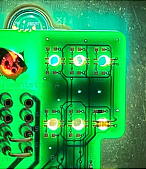 Pic from the Net
Lastly — did you consider adding a separate boost between the Organ Donor's output and the 3PDT?
Could be a simple LP-1, or GPCB's Afterblaster (JFET boost, or wait for
PPCB's version),
Enchanted,
Black Tiger,
Amentum...
