Wiring Order

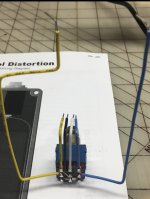
I was just wondering what's everyone's preference for soldering the wiring and specifically what's your order. I'm asking to refine my own order, which I am not really happy with. I always have a tough time navigating the wires to the DC jack because of space. For example, my order is:

1. solder the breakout board wires to the PCB
2. solder the input and output jack wires to the PCB
3. solder the DC jack wires to the PCB

Also, how many of you solder all wires while the pcb and jacks are already in the enclosure. I tend to leave mine out of the enclosure until I solder the DC jack.

Thanks in advance,


Steve
 
I mostly wire it outside in order to be able to test it before boxing it. But now that I have the Auditorium I will start wiring inside the enclosure.
 
I connect the wires to the PCB before it goes into the box because I like the look of the wiring coming out of the top of the board, ie the soldering isn't visible if you take the back off the pedal. It makes no difference to anything except that I think it looks better!

Then I put the DC jack and switch into the enclosure first. Then the PCB, and connect everything. Last things in are the jacks. It's all pretty logical and leaves space for you to do everything.
 
My process doesn't feel very efficient, but I've gotten used to it. Like @HamishR - I like the look of soldering the wires from the back.
  • Put the board, switch, and jacks in the box.
  • Strip and shape all the wires
  • Solder the 3pdt lugs
  • Take everything back out of the box
  • Solder all the pcb connections from the back-side
  • Re-install the board (with now attached 3pdt), and the DC jack
  • Solder the DC jack
  • Install the audio jacks and solder those.
 
I mostly wire it outside in order to be able to test it before boxing it. But now that I have the Auditorium I will start wiring inside the enclosure.
This, then I box it and cut the wires to size. I don’t have a specific order, though.
 
I'm kind of neurotic (in multiple ways), so I do a 3d-printed enclosure which matches the drill template* I'm going to use and wire it up in that. I don't do a "lid" print unless it's a B or A enclosure where some components stick out into the recessed area of the "lid" (don't want to break anything)
  • I usually have a breakout PCB for 3PDT switches, so that's already soldered.
  • Tighten down the pots OFC
  • If I'm doing a board-mounted LED, I'll slide it in, set it properly in the bezel, and then tighten the pot nuts and solder it in, so it's not jiggling around while I futz with wires.
  • I use cheap 24/28 gauge stranded to measure the distances I'll need plus a couple mm extra just in case.
  • Trim and strip the wire to proper lengths based on the sacrificial wire. I do one to start with— to double check myself —then the rest.
  • Monojack wires sometimes go from the bypass switch PCB way up to be top mounted, so those I just sort of fish through the gauntlet of pots and other switches, since I use pre-bond from Small Bear, it's stiffer and is easier to maneuver.
  • I look at the guts and suss out on the spot which soldering order will be best. Sometimes it's the I/O, sometimes it's the monojacks, or some cases it doesn't matter because they won't cross each other.
  • DC jack is nearly always last, and gets bare minimal soldering
  • If it tests fine, I'll gently desolder the DC jack wires, remove and put into the nice box.
  • I'm usually confident (hopefully not too cocky…) that my printed enclosure matches the enclosure, so I'll box it in plastic first, and it should drop right into the final enclosure.
*my templates aren't 100% what a board maker would supply, but they're usually close—maybe 90% of the time I'll reference the build doc. If it's one of my own boards, it's likely the first time I'm doing it, so it's 100% new. Just a matter of scanning/screenshot from eagle the board with precise measurements, and populating components which require drilling. I do it all concurrent with the art and external hardware layout, just to have it all in one Illustrator document. That process is a continual evolution, but it's starting to settle into something that doesn't need minute revisions.
 
Back
Top