Chauffeur Overdrive build HELP. (Pictures added)

marcusbig

New member
Hi All

I've been working on the Chauffeur Overdrive as my first pedal build.

First of all, the inspection of all the parts and the PCB.
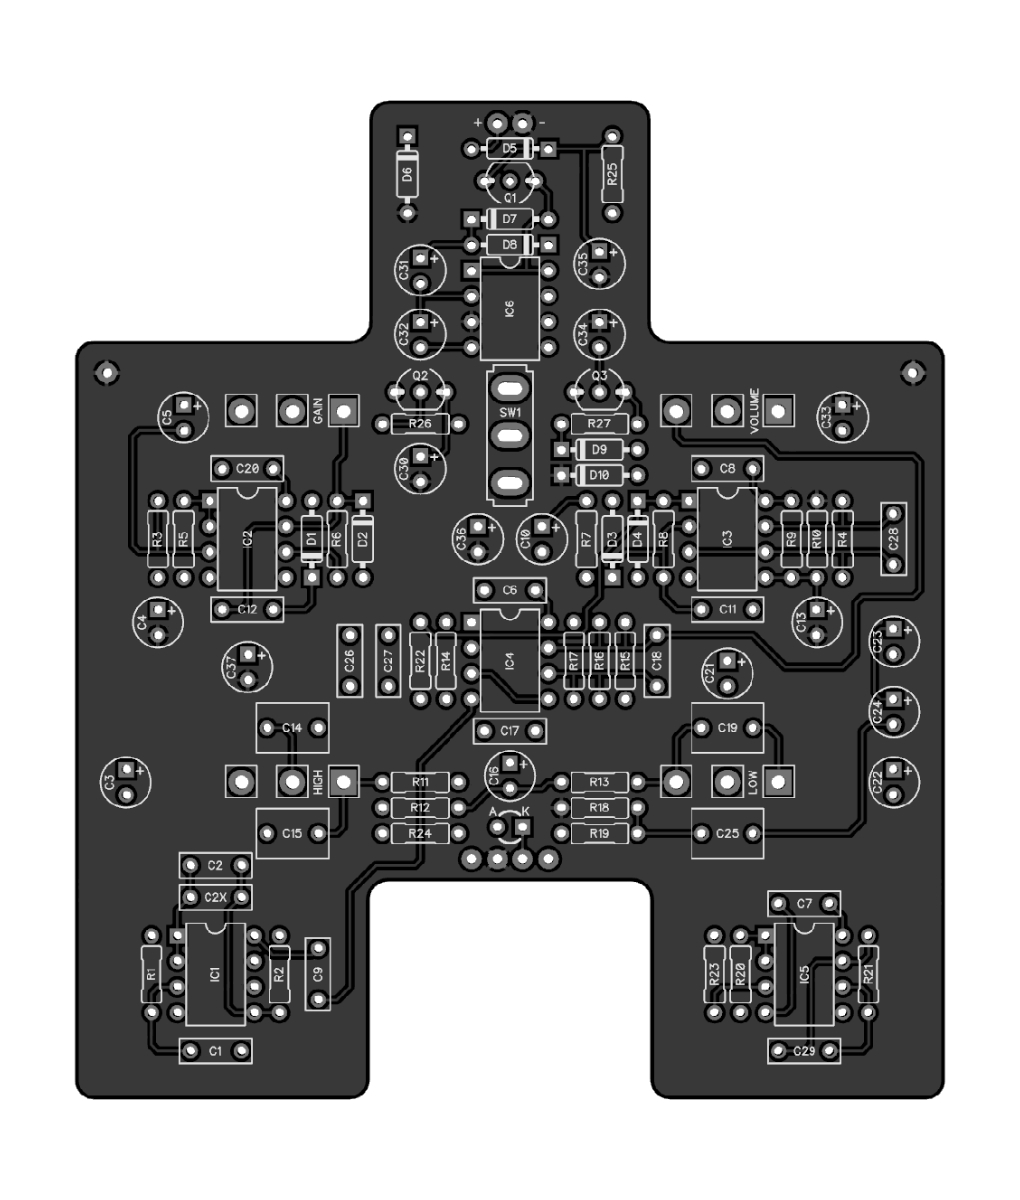
Fortunately, I found that one of the PCB patterns is disconnected in the middle of the line between R13 - IC4 6pin (faulty PCB). Anyway, so I patched it up with a wire.

When I turn the pedal off (LED off), I can get sound through the amp (bypass mode).
However, when I turn the pedal ON (LED is ON), I do not get any sound through the amp. Just quiet (no hum) Even if controlled the 4 knobs, nothing changes.

Does anyone have experience with this kind of problem? Or know how to fix it?
Before I give up, I just want to hear someone's technical opinion.

I will be grateful for any help you can provide. (y)
Cheers. Marcus.

Chauffeur_Front.JPG Chauffeur_Back.JPG
 
Solution
Found the problem. Awesome tone :LOL:

[Replaced parts]
1. C4 - Electrolytic capacitor 47uF. (Faulty)
2. Q100, Q101 - 2N4401 NPN TR (Looks OK but just in case)
3. Q102 - 2N4403 PNP TR (Looks OK but just in case)

[Jump Wire]
There is a connection issue between the gain switch and the PCB pattern for C4 due to disconnection.

Special thanks to @music6000 and @comradehoser (y) your guys inspired me.
I appreciate it.

1706534063185.png 1706534227670.png
With Power Unplugged, Did you check to see if the matching colours had continuity with non matching colours ie A short!?

Resistor R4-1K seems to be causing an issue & R3 - 22K.
You have the correct voltage on Pins 5 & 6 & they go through those resistors???
 
With Power Unplugged, Did you check to see if the matching colours had continuity with non matching colours ie A short!?

Resistor R4-1K seems to be causing an issue & R3 - 22K.
You have the correct voltage on Pins 5 & 6 & they go through those resistors???

YES.
R3 - 22K <------> IC2 pin 5 (GREEN)
R3 - 22K <------> IC2 pin 3 (BLUE)
R4 - 1K <------> IC2 pin 6 (RED)
R4 - 1K <------> IC2 pin 1 &2 (PURPLE)
Note) R3, R4 & R5 resistor values are all correct. (Checked)
Just wondering, do I need to replace any parts?

1706167902812.png
 
Found the problem. Awesome tone :LOL:

[Replaced parts]
1. C4 - Electrolytic capacitor 47uF. (Faulty)
2. Q100, Q101 - 2N4401 NPN TR (Looks OK but just in case)
3. Q102 - 2N4403 PNP TR (Looks OK but just in case)

[Jump Wire]
There is a connection issue between the gain switch and the PCB pattern for C4 due to disconnection.

Special thanks to @music6000 and @comradehoser (y) your guys inspired me.
I appreciate it.

1706534063185.png 1706534227670.png
 
Solution
Found the problem. Awesome tone :LOL:

[Replaced parts]
1. C4 - Electrolytic capacitor 47uF. (Faulty)
2. Q100, Q101 - 2N4401 NPN TR (Looks OK but just in case)
3. Q102 - 2N4403 PNP TR (Looks OK but just in case)

[Jump Wire]
There is a connection issue between the gain switch and the PCB pattern for C4 due to disconnection.

Special thanks to @music6000 and @comradehoser (y) your guys inspired me.
I appreciate it.

View attachment 67107 View attachment 67108
Glad that you got it working!(y)
That still doesn't explain why the voltages were amiss from IC2 Pins 1, 2 & 3???
 
Well, if marcusbig replaced the transistors, could be that was the issue. Haven't looked at the schematic.

Marcus--in future builds, the next step after visual inspection is always reflow all of your solder joints. You have some sketchy solder points which may have led to poor connections that you could have attributed to faulty components. You want your solder joints to look like shiny little mount fujis. The capacitor looks fine in all of your pics. It is a possibility that it was faulty, but I think the probability is quite low. I also think it is a very low likelihood that the pcb continuity was the issue--however, you could do continuity tests between points on the pcb following the schematic before building anything just so that you rule out PCB issues.

Faulty PCBs and components is usually not the problem in my experience if you've sourced them from reliable vendors/manufacturers; the problem is almost always something I've introduced myself (like putting in wrong ICs). Music6000 helped me out with my sabbra cadabra pedal, for example, by having me jumper a transistor that had a bad connection, but I had broken the trace myself by bending the transistor socket to align it.
 
Do you really reflow every joint every time? I always give mine a careful inspection under magnification and reflow anything that I’m not happy with, but my goal is always to make a nice joint on the first attempt.
Considering that I have to set up/tear down my workspace any time I solder (even though for quickies I use my trusty Weller TC iron vs the Hakko station ), the time it takes to reflow them all vs spot checking and reflow is negligible
 
Do you really reflow every joint every time? I always give mine a careful inspection under magnification and reflow anything that I’m not happy with, but my goal is always to make a nice joint on the first attempt.
I was talking about the order of operations once your board is not functioning correctly, but actually, I do as a matter of routine inspect and reflow every joint as I solder, especially after I clip the leads--usually I will populate, solder, and clip all of a kind of component at one time--resistors, for example--so there is usually some touch-up needed. I think I have a personal thing with shoddy joints (too bulbous, misshapen, too flat) even if they are functional. I don't like to see that on my boards. And I reflow out of an abundance of caution so I'm fairly sure that the joint is not the issue if issues do arise.

Troubleshooting order when there is trouble for me is:

-inspect cable arrangement and power supply and amp (forget that i've turned down volume/gain or amp gets unplugged)--several times I've plugged outs into ins)
-inspect and manipulate offboard wiring
-jiggle components, especially socketed transistors and ics, as well as 3pdt solder points
-reflow solder
-visual inspection and compare build values directly to build doc
-swap components when possible
-continuity test along schematic
-voltage test
-audio probe along schematic
-post on pedalpcb
-repeat any order of steps above
-be sad and build another pedal
 
Back
Top