Woodpecker Build Issues (New Version)

Melba Toast

New member
Hi all,

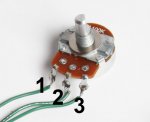
I populated the board for the newest Woodpecker version (Q1 PF5102, Q2 2N5088, Q3 2N6027) and when I connected it to my testing rig I got signal when the switch is on, but only as a boost and no oscillation or changes in depth from the other two pots. The Level pot is the only one that affects signal. I know this was an issue some people ran into with the older versions of the board that often had to do with the transistors, but I was wondering if anyone else had run into this issue with this version (PCB132 rev2 is printed on the back). I socketed the transistors and have tried multiple transistors at each position with the same results and I'm not getting any of the ticking people often talk about with the build.

Thanks in advance,

MT

IMG_3990.jpg

IMG_3991.jpg
 
I don't think I follow, you mean wire up the in/outs where it's usually connected to the 3PDT switch? Those are open for now since my testing rig is basically an empty pedal with no board and I connect the wires from the switch in the rig to those spots (In/Ground/Switch/Out). I wired up the top spots because this would be a weird fit in the testing rig with the SPDT switch in the way. Did I misunderstand your question?

Thanks
 
Ha ha, that's good to know - when I showed my girlfriend my testing rig she asked "Is that how normal people do it?" so now I can tell her yes. Thanks for helping!
 
Cant say I’m a textbook case of normal but for your purposes, sure! Hahaha. Can you gently lift the pots up and get a better shot of your solder side? Component orientation looks fine from the top!

May want to flow the switch a little more too.
 
Hey thanks for the info, I will def give that thread a read-through! Here's a couple pics of the soldering on the other side, I just checked all my Qs with a DMM and they are good, so I know I don't have faulty transistors at least. I will go flow that switch again, I was being too careful I think because I had screwed up and soldered in the wrong switch the first time around and I didn't wanna melt this one.


IMG_3993.jpg

IMG_3992.jpg
 
Fair enough! I always do one, wait a minute and on to the next. Haven’t melted one in a year or two now.

I would reflow the whole row under the rev2 markings, they look a bit dull.
 
Well, I re-flowed everything and no luck...I then traced continuity with my multimeter and found I could get signal to C1 but not to C2 and C2 leads right into the whole blend/depth portion of the schematic. I replaced that 1uF cap and tried again, but it looks like I may have to just settle for this build as a new JFET boost with some extra knobs. I was also able to put the board in my testing rig and remove the 5088 and 6027 Qs and nothing changed as far as the sound but the board still worked as a boost, so somehow that part of the circuit isn't even active I think. It does sound really good as a boost which is a better result than what you usually get when a build goes wrong. Thanks for the help!
 

Attachments

  • Woodpecker.pdf
    710.1 KB · Views: 14
Hmm, sounds like something is shorting out down the path. For sure your R2 is a 47k? Maybe try a different pot for the depth? I’ve torn my hair out before and had the whole issue be a wonky pot.
 
I would check for continuity from the toggle sw lugs to the corresponding components on the circuit. If I understand you right, you had soldered a different sw in, desolder end it, and soldered the new one. I had to do that once, and after I soldered the new one in it wasn't connecting where it should. I assume that the through hole connection was damaged during desolder, so the switch lugs couldn't make contact with traces in the underside of the board.

That said, idk if that would solve your problem, since I think the toggle just changes the speed range.
 
read your posts again, now definitely doubt the sw is causing your issues.

First thing you want to try is can you get signal out at Depth lug3 with the depth pot turned all the way down? You already said something about c2 but I'm not sure where you had the depth pot.
 
Hi Grumpy Gnome, they're all in the correct orientation with the stripe facing down. I think there was some lighting in the first few pics that made it look like they're wrong. Awesome profile pic btw.

Phi, will try your suggestion tonite when I get home. I think when I was testing it before I had the depth and rate pots both at 0 and then both at 10, but will try to find the signal at lug 3 with the pot turned all the way off.

Thank you both for the suggestions!
 
So I tested the Depth pot and with it turned all the way down and I get signal between lugs 1 & 2 but nothing out of lug 3. Once I turn the pot up 1/2 way I lose all signal between lugs 1 & 2 and get no signal from lug 3 at any time even with it turned all the way up. Is this a bad pot?
 
Are you using this convention for the lug numbering? Sounds like you might be doing it the opposite way, otherwise your description doesn't make sense.


Beyond that, it seems like the lfo section might be bad, constantly saturating the 2n5089 instead of sweeping it from on to off.
 

Attachments

  • image.jpg
    image.jpg
    39.8 KB · Views: 3
Also,when checking for signal, just ground the ground side of your audio probe, and check for audio signal at each point with the other side of your audio probe. There's not usually a need to check for signal between 2 non-ground points.
 
Back
Top