TUTORIAL Basic fret level, crown & polish made easy (picture heavy)

MichaelW

Well-known member
Not really sure if this thread belongs here but it's the only forum that has a "tutorial" badge.

As promised in @BuddytheReow 's parts caster build thread. Here's a method of doing fret level, crown and polishing that's relatively simple and doesn't require a lot of really expensive tools.

I've mentioned before that getting frets right on ANY guitar at ANY price can make or break how a guitar plays.

You WILL require SOME tools. So at a minimum you will need the following:

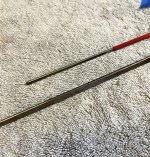
1. Notched straight edge
You don't have to spend a ton of money on these. I actually have a cheap one from Amazon that does the job.
Here's one.

2. Level Sanding Beam
Again, this is a MUST HAVE but you don't need to spend a ton of money.
I like the style that allows you to level "under the strings". There are times when chasing down fret problems is handy to have one that will work with the strings on. But that's another tutorial for another day.

I like have a longer one and a shorter one but this isn't critical. If you're only going to choose one size, get the 9 inch. It's long enough to be stable doing the whole fret board and short enough for spot leveling certain parts of the neck when necessary.

I have both an expensive StewMac one as well as this cheap one from Amazon. They both work fine.

3. Fret Crowning File or 3 Corner File
Fret crowning files can be ungodly expensive. 3 corner files are cheap but you'll need to grind the edges down so it only cuts on the flat sides.
Or you can get a specialized 3 corner file that has already been ground down.
This is the cheapest "GOOD" fret crowning file if you go that route. $60 investment.

There are cheaper ones but I don't have any experience with them or how good they are.

Before buying a cheapo fret crowning file, I'd spend a couple extra bucks and get the StewMac medium 3 corner file as you can use it for other stuff too. And it does a great job crowning.

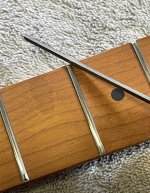
4. Fret Rocker
Again you don't need to spend a ton of money on the expensive ones. The cheap ones are fine as long as they are straight.
Here you can get a notched straight edge and fret rocker kit for about $12.

5. Various grits of sandpaper
400, 600, 800, 1000, 1500

So basically, you'll need to invest about ~$80 but these tools will last you pretty much a lifetime. And once you've done your own frets and have your guitar playing like "buttah", you'll wonder how you ever played your other guitars and will be working on them too:)

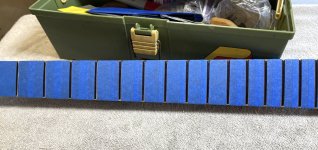
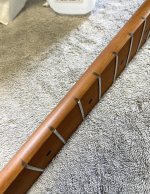
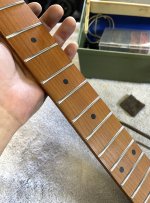
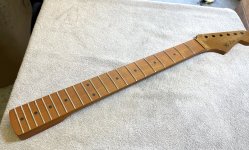
This is the neck I'll be working on today. It's a Chinese made Ebay neck. If you've followed my Strato-tele-blaster threads you'll know I've have mixed results with these cheap necks. But this one looks really solid and the frets are well seated. It's quite pretty roasted maple and it was about $50 as I recall.
IMG_5250.JPG

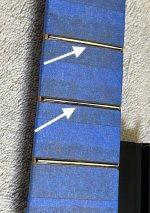
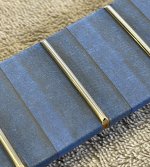
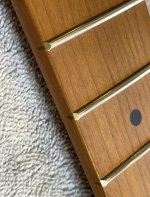
Here's a closeup of how the fret ends are dressed......meaning they really weren't dressed at all. No big surprise. But what I'm looking for here is any loose frets or frets not completely seated correctly. You'll want to deal with that before starting. Loose frets can be tapped in with a brass or soft hammer.
Or they can be glued and clamped. You can "wick" some super thin superglue along the edges then clamp with two strips of paint stir stick to make sure the ends are nicely glued down. No problems on this neck so we'll move on.
IMG_5251.JPG

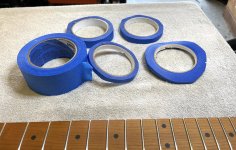
Since this is a maple neck with a finish already applied, I'm going to mask it. I generally don't mask when working on rosewood necks because I'll scrape the fingerboard with a razor blade as a last step to smooth it out. Maple fretboards with or without finish don't scrape easily and wind up looking worse if you do.
So best to protect it while you work. I use plain old painters tape. I got a package with different widths off Amazon.
IMG_5252.JPG

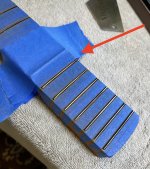
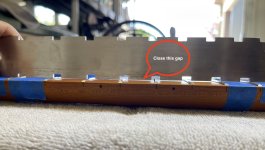
Ok, this is a bit out of sequence here but before you put masking tape on, you need to make sure the neck is as straight as possible. (As you can see, I forgot before I started masking heh)

What I do is check the function of the truss rod first. I loosen it, and if it's a double action truss rod, make sure it engages in both directions.
Using your notched straight edge while it's loosened check for gaps around the 5th-7th frets. Slowly tighten the truss rod until the gap closes. Try rocking the level, if it rocks then you've gone too far. Back it off a little. Ideally you want no gap and also no rocking. But keep in mind that the neck is made of wood and it won't ever be "perfectly" level. Just get it as close as possible.
IMG_5253.JPG

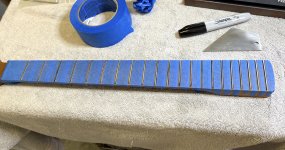
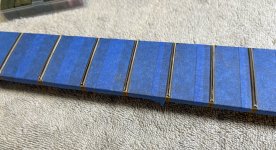
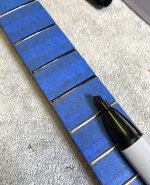
With the neck straight, and fretboard masked off, you're ready to start leveling. First use a sharpie and mark the tops of each fret. I like to use the wide sharpies as they cover more evenly.
IMG_5255.JPG

All marked off here......

IMG_5256.JPG

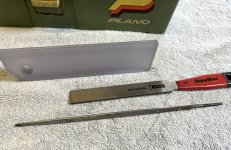
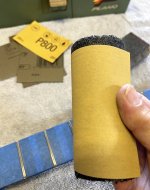
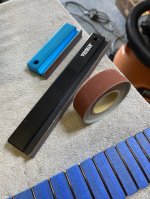
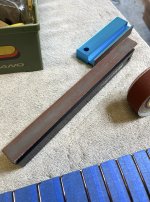
Here are my two sanding beams, but for the purposes of this illustration I'm just going to use the longer one. It's a 9" beam. You can buy the special sanding rolls from StewMac and pay big bucks, or you can just do like I did. I got a roll of emery sandpaper 320 grit from Amazon for $7. It doesn't have adhesive on the back, so I just use some double sided tape, stick it on, then trim the edges with a razor blade.
IMG_5257.JPG

IMG_5258.JPG

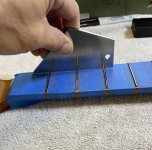
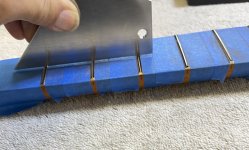
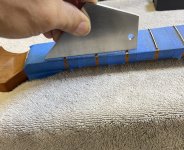
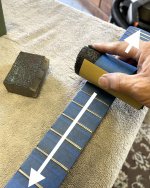
The first few passes with the leveling beam you want to run the full length of the fingerboard, working slowly from side to side following the radius of the fingerboard. You don't want to put a lot of pressure while sanding, usually the weight of the aluminum beam is all you need.
The point here is to make sure you "kiss" every fret and sand off the sharpie marks. The first time you do this you might be alarmed at how much material you're taking off at certain parts of the neck. Don't be, this is normal.

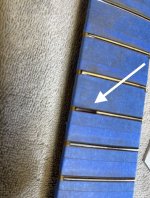
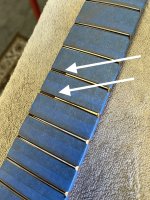
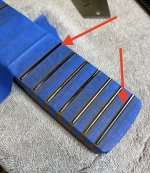
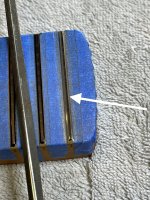
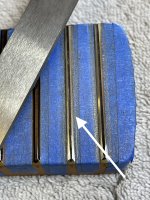
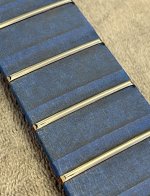
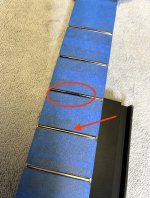
See the pic below where the arrow is pointing at what seems to be a lot of flattening on one fret but the circle shows that there's another fret that hasn't been touched yet. This is the whole point of fret leveling. You want them all the same height at this point.
IMG_5259.JPG

After a few passes, stop and inspect your progress, go slow. You can always take more material off but you can't put it back on.
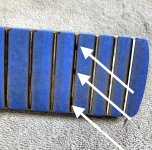
What I'm looking for at this point is "low spots". Meaning the sharpie mark hasn't been sanded off yet. Resist the urge to "spot level" that one area, you don't want a "dip" on the frets. Sand the whole fingerboard until all the frets have been touched. The amount taken off each fret will be different, it won't be all uniform.
This is normal, it just shows that the frets were not level.
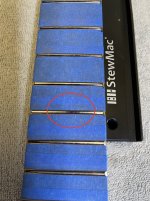
IMG_5260.JPG

Continued in next post.
 
Last edited:
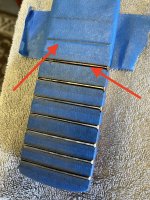
Note the difference of how much material is taken off on adjacent frets. One fret was high and one was low. The whole point here is to normalize the height of the frets. Remember to use long smooth strokes and cover the whole fingerboard.
IMG_5261.JPG

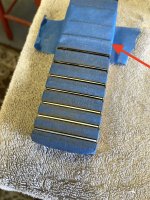
Note that when level I've "kissed" the tops of the lowest frets and the sharpie mark is sanded off but each fret will have differing amounts of material taken off.
IMG_5262.JPG

Once each fret has had the sharpie mark sanded off or "kissed" in some places. It's time to check your leveling job.
This is where the fret rocker comes in. It's an invaluable tool.

IMG_5263.JPG

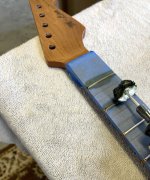
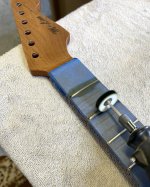
You want to check every single fret relative to its neighboring frets on each adjacent side. Place the rocker on the frets and hold it straight (perpendicular to the fret) and gently try rocking it. If it doesn't rock then then fret is level relative to it's adjacent frets on either side.
I check 3 spots, the two edges where the E strings will run and also the center.
IMG_5264.JPG

IMG_5265.JPG
IMG_5266.JPG

Work up and down the neck checking every fret position. If you find a spot that rocks, mark it with a sharpie.
You WILL find high spots, expect it. Unless you're a human PLEK machine you're leveling beam work will never be perfect.

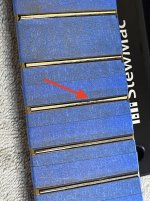
Here's some high spots I found.
IMG_5270.JPG

IMG_5271.JPG

Go back over the fingerboard with your beam and sand these marks off. Remember, resist trying to "spot level" these high spots, you'll wind up with a dip and be chasing your own tail. Long smooth strokes across the whole fingerboard until the high spots are sanded off.

Repeat the process with the fret rocker looking for high spots and continue until there are NO frets that rock with the rocker.
Again, not too much pressure on the beam, the weight of the beam is usually enough.

Continued in next post....
 
Busting in with the EU tips..

Chris Alsop Guitars has some great fretwork tools for reasonable prices.
This is the set I’ve been using, I have a triangular file for crowning but stopped using it after I got these.
 
This next step is a little controversial with the luthier community. Some will say it's not necessary if you've done your leveling correctly.
Others will say it's absolutely necessary especially with bolt on necks.

I've found that if I don't do it, I usually wind up going back later and doing it anyway. Keeping in mind that I am very particular about how my guitars play especially in the higher registers while bending. I don't want any fret outs with deep bends in ANY position on the fretboard.

Typically with bolt on necks you will have a slight (or sometimes not so slight) "hump" around the 14th fret.
If you think about how a neck is constructed and how a truss rod works and the part of the neck that the truss rod affects, you can see that it's inevitable to have SOME hump where the neck joins the body. Sometimes the hump is minimal enough that it won't affect how the guitars play.
But if you like low to medium-low action like I do. AND you want all notes to play cleanly, like I do heh, AND you want to be able to do those big David Gilmour bends high on the fretboard like "Shine On You Crazy Diamond" then you'll need to deal with the hump.

So if think about the geometry of the neck, you have the "relief" which the truss rod affects. Then you have the "hump" where the truss rod can't affect the neck because it's attached to the body, then after the hump as you move up it's called the "fall away" where the fingerboard gently slopes back down IN RELATION to the body and more importantly, the bridge.

Here's an illustration of natural "fall away" on an acoustic neck.
Fall-Away-with-Proper-Acoustic-Guitar-Neck-Relief.png

With bolt on necks, sometimes this effect can be a bit more exaggerated (and infuriating). The "hump" can span a couple of frets, forcing you to raise the action until the guitar plays cleanly.
You don't want the neck to dictate the action of the overall guitar, rather you want to target a certain action height then make the neck work at that action.

So this technique is basically creating or exaggerating the the "fall away" by creating that slope in the fret level process.

Here's how I do it. (Keep in mind we're talking a few mils here, it's not a huge slope.

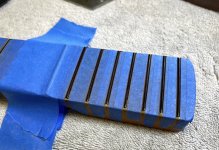
First I put 3 layers of masking tape where I want to fallaway to begin, usually around the 15th fret.

IMG_5272.JPG

Then using your sharpie, mark the frets that you will be sanding to create the fall away.
IMG_5274.JPG

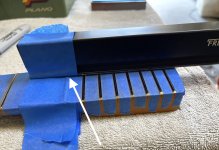
Then I put another piece of masking tape on the sanding beam where it rides up on the taped frets I don't want to sand.
IMG_5276.JPG

At this point I have 4 layers of masking tape creating the "angle" of the fall away. You can use less tape, but I like to start with 4 layers then gradually remove a layer at a time as I work and inspect my progress, again go slow, you can always take more off.

Notice the angle of the fallaway by how the sanding pattern is on the frets you're leveling.
IMG_5277.JPG

Now I'll remove one layer of tape from the fingerboard and sand some more.
IMG_5278.JPG

I continue doing this until I'm either down to one layer of tape or all the frets in the fallaway have been "kissed".

IMG_5279.JPG

After creating the fallaway, yep you guessed it, break out the fret rocker and check for high spots. Here I've found a couple of high spots on one fret. This would totally cause fret out while you've got your David Gilmour lips pose playing the solo to "Dogs".

IMG_5280.JPG

Again, resist the urge to "spot level" that fret and hit them all with slow even strokes. Once the sharpie marks are sanded off, check it again with your fret rocker until you have no rocking in any of the positions of the fall away.

Once this is done, your frets are level and we're readying to move on to crowning.

IMG_5281.JPG

Continued in next post......
 
Crowning Frets

Time to get out the sharpie and re-mark the tops of all the frets again.

Depending on what type of file you have the crowning process has the same goal. The idea is you take your now "flattened" fret tops and put a "crown" or peak in them so that the fretted string is touching a narrow point. Otherwise it won't play in tune or intonate.

IMG_5283.JPG

For illustration purposes I'm going to do the first fret (or last fret) "old school" using a 3 corner file. What you're aiming for is to knock the "corners" of the flat fret top down and leave only a thin line of sharpie mark left. Don't sand ALL the sharpie mark off you'll defeat the purpose.

IMG_5284.JPG

About dedicated fret crowning files. You can spend a crap ton of money (like I did) on some of the better fret crowning files from StewMac,
so what's the advantage of using a fret crowning file vs a 3 corner file?

Basically, it saves time. If you're a repair tech, time is money, and turning out fret jobs in 30 minutes vs 2 hours, means you can do more fret jobs in a day. For me personally, I can still do a more accurate crowning with a 3 corner file, even my cheap home made one.
But to illustrate, it took me about 2 minutes to do that one fret in the picture above, it took me about 5-6 minutes to do all the other 21 frets on the neck with my StewMac Z-File. Both files require some practice to use correctly, but I find the 3 corner files to 1) be more accurate and 2) be less prone to mistakes and sloppiness.

The next fret here in the below pic I used my StewMac Z-file.
IMG_5285.JPG

Not quite as clean as using my 3 corner file. So you want to get a nice thin line or sharpie left. It doesn't need to be super thin as we still have to dress the frets. At this point we're just "roughing in" the crown so to speak.

IMG_5286.JPG

Once the crowning is down you have a couple of options which way to go next in the dressing.
The "dressing" is simply the process of removing the scratch marks from the leveling and the crowning.

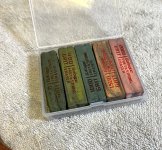
One method is to use "fret erasers" like the pic below. Again, you don't have to pay out the nose and buy the StewMac ones.
I got this set by "Baroque" off Amazon for like $25.
These work well, basically use them like an eraser, start with the heaviest grit and work your way down to the finest grit. The first grit is the most crucial and takes the most work, it gets the big and deep scratches out. If you get that done right, the rest of it's pretty easy going.
IMG_5287.JPG

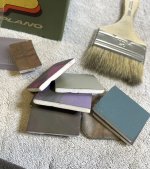
Another option is to use micro mesh pads like the below, same concept. Start with the heavier grit first and work your way up to the fine ones.
IMG_5288.JPG

Incidentally, both the fret eraser and micromesh come in "grits" that have ZERO relationship or corresponding to actual sandpaper grits. So ignore what grit they happen to call them.

Then finally, there's good old sandpaper. I'm going to show you an easy hack to do the polishing, which is really probably the most labor intensive part of this whole process. AND I've discovered lately that doing a set of frets with either erasers or micro mesh gives me hand cramps. (Yes, being old and getting older sux......heh)

IMG_5289.JPG

So the "hack" I'm going to go over is actually how a LOT of high volume factories do fret jobs. And the results "can" be spectacular.
I've mentioned before that probably the best fretwork on an out of the box guitar is PRS. They do an amazing job on the frets of even their cheapest Indonesian made SE models. I've never played or owned a PRS with anything short of a stellar fret job.

So it might be a "hack" but it's also a very effective way to polish frets with few downsides. (But there IS a downside, I'll get to that in a bit).

Basically, I'm using sandpaper. I'll start with 400 grit, then 600, 800, 1000, 1500. I didn't have any 1000 grit so I skipped it today and went from 800 to 1500.

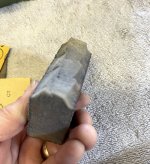
First thing you'll need is some sort of soft sanding block that either comes to a blunt point or is a small diameter round.
I took a foam sanding block and used some scissors and cut a crude point into it. It might look ugly but I've been using this for years and it works great.

IMG_5290.JPG

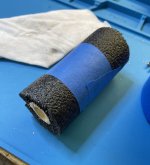
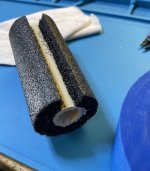
Another thing you can do use some pipe insulation and stiffen it with a dowel or something.
I just made this one today in preparation for wet sanding the cutaways on my strat project. it's a bit too wide a diameter to be ideal for fretwork. But it does work.
IMG_5291.JPG

IMG_5292.JPG

Continued in next post......
 
Last edited:
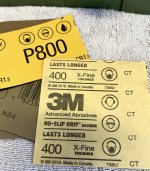
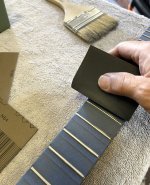
So I wrap the sandpaper around the round or pointed block and just run it up and down the frets.
I'm not working on a single individual fret at a time but rather the whole fingerboard.

IMG_5293.JPG

IMG_5294.JPG

The "downside" is that unless you have a really pointy sanding block, it's hard to get the whole fret and usually it leaves some marks on the sides of the fret. It doesn't affect playing, because the tops of the frets are smooth as a baby's bum. But it bugs me to see it heh.

So what I'm looking for here with each grit is to see no sanding marks. Again, go slow, check your work often. And the FIRST grit you use (400) is the most important. Getting all the scratch marks off at this stage is going to make each successive stage that much easier.

IMG_5295.JPG

I went back to my ugly foam block to try to get more of the fret polished since the round one was a little too big, especially higher up.

IMG_5297.JPG

By the time you're done with the 1500 grit, it's actually ready to play with a nice smooth feel.
IMG_5296.JPG

BUT that's not good enough for me. I want a higher level of polish and more buttery feel.

The next steps are optional but highly recommended. Once you've played a high polish fret job it's hard to ever go back.

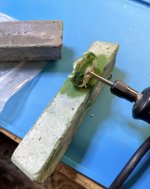
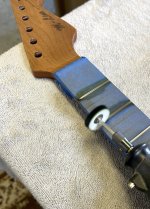
I use a Dremel with either a felt wheel or a linen buffing wheel. I kinda like the layered cloth wheel better because it doesn't build up heat as fast. (Which is important, I'll get to that in a sec).

I'll either use some jewelers rouge or a green buffing compound block and get some cutting compound on it. This is from a knife strop set I have to sharpen my convex blade knives. What compound you use is not critical.

IMG_5298.JPG

The trick here is to not hit the fret too hard and heat it up too much. If it gets too hot it will soften the glue holding the frets in and you'll wind up with loose frets.

IMG_5300.JPG

Better to hit for 20-30 seconds, move on to the next fret then make another pass after it cools down.

IMG_5301.JPG

Polish the fret ends here and get any remaining sharpie marks off. The rouge won't change the fret end geometry much (which you do NOT want to do). Use a light touch and let the wheel and rouge do the work.

IMG_5302.JPG

Now THAT'S a high shine polish!
IMG_5303.JPG

Continued in next post.....
 
Last edited:
If you don't have a Dremel you can still do it old school. Even after I use the Dremel I'll do a final polish by hand.
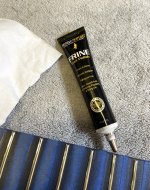
You can use any kind of metal polisher, like Flitz, or "never dull" wool. But I like this stuff from MusicNomad called "Fret Frine". (Say that 5 times fast...:)

IMG_5304.JPG

IMG_5305.JPG

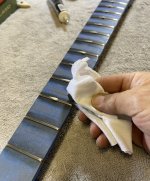
After the Dremel and fret polish you can remove the masking tape. The Dremel will usually leave some schmuck on the neck. A little IPA on a rag will clean that all up and clean up any tape goo left over on the neck.

IMG_5306.JPG

Now for the final step in the process. I always leave this to the very end. Dressing the fret ends.
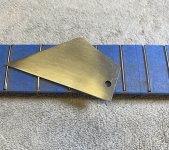
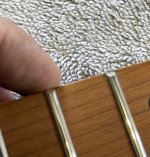
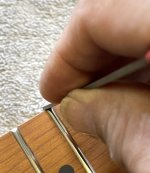
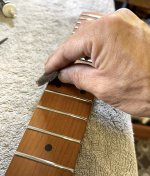
You can use your handy dandy 3 corner file that's made quite a few appearances so far but I really like a dedicated fret dressing file. They're not too expensive, even the Stew Mac one. I like it because it's a "safe" file with one side rounded and the other side flat but only sides have a cutting surface so it won't damage the fretboard.

IMG_5308.JPG

This step is where a lot of people make mistakes by changing the geometry of the fret bevel. You really don't want to do that because you'll find that the string slips off the frets on the E strings if you mess with the geometry of the bevel angle.

What you're trying to do here is to knock off the sharp ends of where the frets seat into the fingerboard. You want to keep the file somewhat perpendicular to the fretboard and just gently knock off the sharp points. You also want to do a very very gentle "roll" as you finish your stroke.

This takes a bit of a touch to get proficient but as always. go slow at first. After you've done a few frets you'll get a feel for it and it speeds up.
IMG_5309.JPG

Everyone has their own process of being efficient, but mine is to do one side of the fret all the way down the neck. Then turn around and do the other side all the way back.

You want to feel as you go with your finger to make sure there's nothing sharp left.
IMG_5312.JPG

Notice in the picture below what I'm doing here. I'm basically "bull nosing" the edge of the frets.
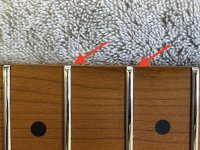
The right side fret is done, the left side fret has only one side done.

IMG_5310.JPG

Once that parts done on all the frets use your finger again and check if any of the fret ends are poking out beyond the fingerboard.
IMG_5312.JPG

There's usually a couple. Use the flat side of your file and gently knock that off WITHOUT changing the bevel angle or filing into the wood.
A light touch is all thats needed.

IMG_5313.JPG
Continued in next post......
 
And the final final step, you can use some scotch brite or a fine micro mesh pad or even just some 1200-1500 grit sandpaper and gently run it up and down the corner of the fretboard to give it a final polish so it feels good running your hands up and down the fretboard.

IMG_5314.JPG

And bobs yer uncle, you're done!

IMG_5315.JPG

I'll say again, it's rare that you won't need to go back and dial some things in after you've set up your guitar to your liking.
But resist trying to do that right after you've strung it up for the first time. Let it sit under string tension for a week or so before doing a final tweak.

Hope this tutorial has been helpful!

Not sure of there's any interest in 'set up basics" but that would be a logical follow up to this one.
 
Last edited:
That's a really excellent run thru on the process. You're right too, with a small bit of $$$ you can be doing pro setups and once you get the hang of it you'll be doing all of your own equipment. Here in Illinois the weather changes so drastically that little Stew Mac file will be your best friend for taming ends and fret barbs as the neck shrinks and expands. I like the little metal fret shields that Stew Mac and other's sell for this as well, especially for spot fixes.

Setting up a bridge for proper intonation might be a good follow up now that the guitar feels so good you can't put it down :)
 
This is a phenomenal writeup! Well done, Michael. And to your first post, yes. The Test Kitchen is becoming a great depository of knowledge thanks to you. I'll be adding some of these items to a future Amazon purchase.

Question for you, @MichaelW how much material does this take off? In other words, how many times can I do this before a refret or new neck?
 
Dude I've said it plenty of times before but you're the man!

Awesome guide I love pictures this should be easy to follow :ROFLMAO: 🤟
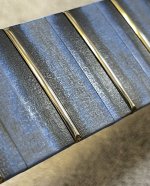
 
As everyone else has already said this is amazing. I don't have enough experience yet to have real opinions, but I'll plug a couple of the things that I bought when I started tinkering after being inspired by your other posts:

I bought this straight edge since it covered both 25.5” and 24.75” scales as well as having a straight edge to check across all the frets (not a replacement for a rocker).


and I opted for the Dagger like you previously suggested because I felt like it was more newbie friendly than the 3-corner or z-files files.


I feel like it's pretty idiot proof, unless I'm such an idiot that I didn't notice I was screwing things up :) Thanks again!
 
Question for you, @MichaelW how much material does this take off? In other words, how many times can I do this before a refret or new neck?
That depends on a lot of factors beginning with how tall your frets were to begin with. The fret level process doesn't take as much material off as it looks like it does. It should only be a couple hundred thou. But expect to take more off your first time doing it, it's pretty normal to over do it as you learn and thats perfectly fine. When we talk about fret life and how many levels before a refret we're usually talking about "decades" unless you're a gigging musician that plays every night and only plays one guitar and has a very heavy touch.

Also, unless you really mess up the initial fret level, it's pretty rare that you'll need to do another FULL neck re-level. In the ongoing life of a guitar sometimes you'll need to do a "partial" level or a partial refret.

Full re-frets are pretty rare unless you want to change the size of the frets, or it's a really really old guitar.
 
Big thanks for doing this, Michael. I've had some of the tools for ages and bought most of the rest in the last year, and I'm slowly working my way towards using them. Your work in putting this info here is greatly appreciated.
 
So generous of you to take the time to do this @MichaelW. I’ve followed a very similar procedure when one of mine needed a fret leveling. Thanks for putting this out there in such an easy to digest format!
 
Best fret leveling tutorial ever.

+1 for using (coining?) the term "bullnosing"

I've done fret end dressing and polishing but I've never attempted fret levelling and crowning. My Coronet needs it.

I have a question. When you polish the frets after crowning, shouldn't you go along, not across the frets? I know your method saves time and I've seen experienced techs use it as well but strings run along the frets after all. Polishing the frets that way covers the whole surface of the frets, nicely rounding the crown.
What say you, @MichaelW ?
 
Back
Top